Hello guys, welcome to my favorite tutorial..........
In this tutorial, I will show you how to
create light effect in Corel Draw. We will learn how make some elements look a
bit grumpy.
Ok let’s get started
First you have to get Corel Draw working
in your system
SYSTEM
REQUIREMENT
Corel Draw x4 or x3
Corel Photo paint
TIME
CONSUMING
30-45mins
CHANGE
THE SIZE OF YOUR DOCUMENT TO A6
Now create a rectangle and fill it with
radial effect by selecting or press (F11) on your keyboard to fill
On the type select Radial, for the FROM
put BLUE and TO put cyan and OK it, you will something like this
ON
THE BOX DRAW A CIRCLE ON IT, JUST AN OVAL SHAPE
We are going to draw about 3 circles, create
the First circle and transparent it, and double it up to three times , while
the third one, we will then remove the transparency effect on it.
If you do this correctly, you should
arrived at this
NOW
DRAWING OUR BASE
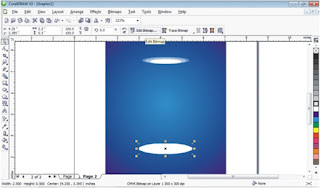
We will copy and paste the third circle but
the non-transparency circle, just as the selected image in step two, resize it to
2.5 by 0.5 inches and Convert it back to Bitmap, so that we can achieve
vignette on it.
Go to the top, locate Bitmap and select Edit
Bitmap or press (Alt and B), it will take us to COREL PHOTO-PAINT
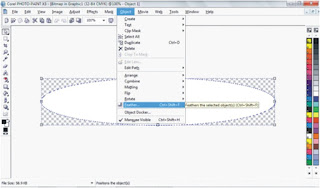
Note: But make sure the circle is selected.
GO TO OBJECT + FEATHER OR (CTRL + SHIFT + F)
And dialogue box pop up just input 41 for
the width (Linear) and OK it.
Close the programme, it will ask you, (Do you want to save this file say) “YES”.
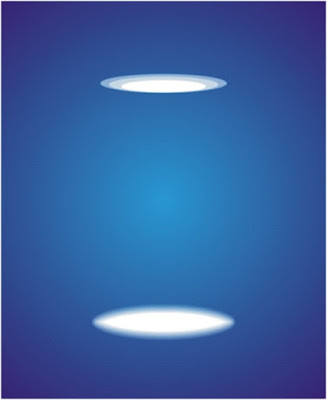
It will take us back to Corel Draw; you
should have something like this
ADDING
THE RAY EFFECT FROM UP TO DOWN
Now create a shape like this, using
rectangle tool or press (F6) and use shape tools to shape it exactly like the
above image
Convert the shape to bitmap and Edit
Bitmap, and repeat ‘Step Four’
Go to Object + Feather or (Ctrl + Shift
+ F), and dialogue box pop up just input 135 for the width (curve) and OK it.
NOW
TRANSPARENT IT AND DUPLICATE IT UP TO FOUR TIMES
And Group them, convert them to bitmap,
enlarge and size it
Faint the bottom of the shade and put
your text in it, and sending the shade on top of the text by Selecting the
shade and press (SHIFT + UP). And that all


No comments:
Post a Comment